Now Reading: How to Connect a Gaming Monitor to a PC Without Losing Hz
-
01
How to Connect a Gaming Monitor to a PC Without Losing Hz


Simple way of how to connect a gaming monitor to a PC, plug the monitor into a video output on the dedicated graphics card using DisplayPort or HDMI, connect the monitor to power, select the matching input, and start Windows. Then open Settings > System > Display to choose the native resolution. Open Advanced display and select the monitor’s intended refresh rate, such as 144Hz, 165Hz, or 240Hz.
Table of Contents
The physical connection takes only a few minutes, but the default Windows settings may not use the monitor’s full performance. A 165Hz display can remain at 60Hz until you change it manually, and a cable or port with insufficient bandwidth can hide the highest resolution or refresh-rate option.
Quick Setup: Connect a Gaming Monitor in 8 Steps
- Identify the video outputs on your graphics card or laptop and the inputs on your monitor.
- Choose a compatible DisplayPort, HDMI, or USB-C video cable that supports your target resolution and refresh rate.
- Connect the monitor’s power cable and turn the monitor on.
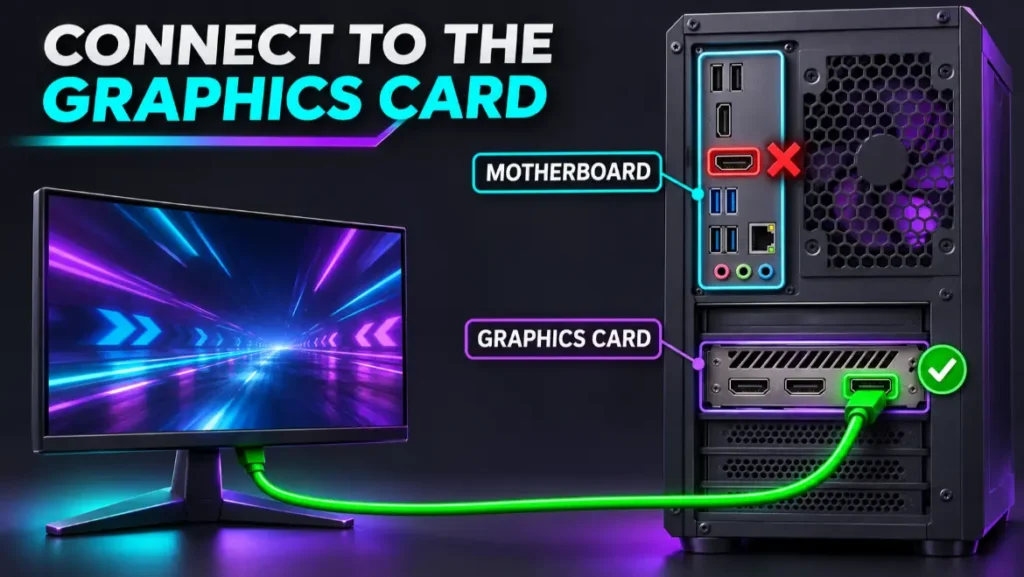
- Connect the video cable to the graphics card, not the motherboard, when using a desktop with a dedicated GPU.
- Use the monitor’s controls to select the matching DisplayPort, HDMI, or USB-C input.
- In Windows, set the monitor to its native resolution.
- Open Advanced display and select the maximum intended refresh rate.
- Enable adaptive sync on the monitor and confirm FreeSync or G-SYNC in the graphics software when supported.
If the monitor immediately shows your desktop, the cable is working. That does not necessarily mean the setup is finished. Confirm the resolution, refresh rate, variable refresh rate, color format, HDR setting, audio device, and any required USB connection.
What You Need Before Connecting the Monitor
Most gaming monitors include at least one video cable, but the included cable is not always the best match for every PC. Check the following before moving the equipment.
A Compatible Video Output
A desktop graphics card commonly provides DisplayPort and HDMI outputs. A laptop may provide HDMI, Mini DisplayPort, USB-C, USB4, or Thunderbolt.
The connector’s shape does not reveal every capability. For example, one USB-C port may carry DisplayPort video while another USB-C port on the same computer handles only data and charging. An HDMI port may support a lower maximum refresh rate than the monitor’s DisplayPort input.
Check the manuals or specification pages for both devices. You need to know:
- Which video outputs the PC provides
- Which inputs the monitor accepts
- The port versions or supported display modes
- The monitor’s native resolution and maximum refresh rate
- Whether adaptive sync and HDR work through the selected connection
A Cable With Enough Bandwidth
Resolution, refresh rate, color depth, HDR, and chroma format all use link bandwidth. A cable or port that handles 1080p at 60Hz may not support 1440p at 240Hz or 4K at a high refresh rate.
Intel’s video-output bandwidth guide explains that bandwidth requirements depend on resolution, refresh rate, and color depth. The slowest part of the connection determines what you can use: the PC output, cable, adapter, monitor input, or dock.
Use the cable included with the monitor when its manual recommends it. If you need a replacement, choose a properly certified cable rated for the required mode rather than relying on vague terms such as “gaming cable.”
The Monitor’s Power Cable or Adapter
A DisplayPort or HDMI cable carries the picture and can carry audio, but it normally does not power a desktop monitor. Connect the supplied power cable or external power adapter before expecting a picture.
USB-C monitors can sometimes receive video and provide charging through one connection, but the exact power direction and wattage vary. A gaming monitor still may need its own power input even when connected through USB-C.
DisplayPort vs HDMI vs USB-C for Gaming
There is no universal connector that wins for every monitor. Choose the connection that supports the display’s native resolution, full refresh rate, adaptive sync, HDR, and color depth on your exact PC.
| Connection | Best use | Important checks |
|---|---|---|
| DisplayPort | Desktop gaming PCs and high-refresh monitors | Port version, cable certification, adaptive-sync support, DSC requirements |
| HDMI | Gaming PCs, laptops, consoles, TVs, and monitors | HDMI capability of both ports, certified cable type, VRR and HDR support |
| USB-C | Compatible gaming laptops and compact PCs | DisplayPort Alt Mode or Thunderbolt support, refresh-rate limit, charging capability |
| DVI | Older PCs and legacy monitors | Limited modern features, no common VRR or HDR support, cable type |
| VGA | Emergency use with old hardware | Analog image, poor fit for modern high-resolution or high-refresh gaming |
When to Use DisplayPort
DisplayPort is often the easiest choice for a gaming desktop because gaming graphics cards and monitors commonly support high refresh rates and adaptive sync through it.
VESA recommends checking the connector type at both ends and using a properly certified cable. Its DisplayPort cable guidance also explains that an expensive cable does not make a supported digital signal look sharper. A poor or unsuitable cable can instead cause instability, corruption, flickering, or missing modes.
Use DisplayPort when:
- The monitor’s full refresh rate is available only through DisplayPort.
- You want DisplayPort Adaptive-Sync on a compatible setup.
- You plan to use Display Stream Compression for a demanding mode supported by both devices.
- You are connecting multiple compatible displays through daisy-chaining.
When to Use HDMI
HDMI is a good gaming connection when the graphics card, monitor input, and cable support the intended mode. At the same digital resolution, refresh rate, and color settings, HDMI does not inherently produce a less sharp image than DisplayPort.
HDMI is particularly useful for laptops, gaming consoles, TVs, capture devices, and monitors that reserve certain features for an HDMI input.
For demanding HDMI modes, look for the official cable designation and certification label rather than an unverified version claim. The HDMI cable resource explains that certified products are labeled by their official cable names.
When to Use USB-C
USB-C can be convenient for a gaming laptop because one cable may carry video, data, and charging. However, USB-C describes the connector, not a guaranteed video capability.
Confirm that the computer’s USB-C port supports DisplayPort Alt Mode, USB4, or a suitable Thunderbolt mode. Also confirm the cable carries the required video bandwidth. Some USB-C cables support charging and basic data without display output.
A USB-C monitor’s built-in USB hub may work through the same connection. When you use HDMI or DisplayPort instead, the hub often requires an additional USB upstream cable.
Where Should You Plug the Monitor Into a Desktop PC?
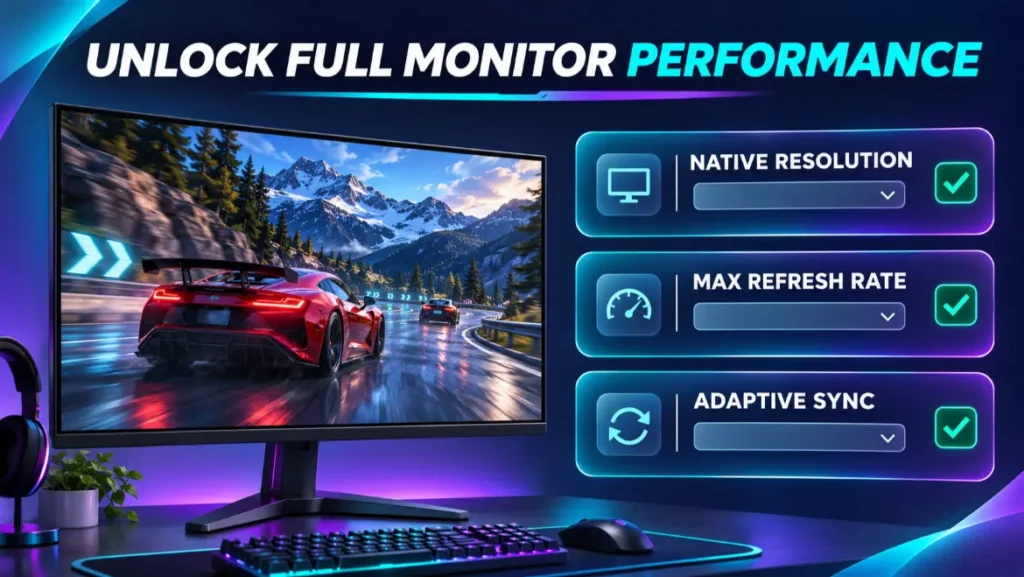
If your desktop has a separate graphics card, connect the gaming monitor to the graphics card’s DisplayPort or HDMI output. These ports are normally lower on the rear of the case and aligned horizontally with the graphics card’s expansion slots.
Do not automatically use the video ports beside the motherboard’s USB and audio connectors. Motherboard video outputs rely on integrated graphics and may not work when:
- The processor does not include integrated graphics.
- Integrated graphics is disabled in firmware.
- The system is configured to use only the dedicated graphics card.
- The required gaming performance or display mode is available only from the dedicated GPU.
Connecting the monitor to the motherboard can also route the display through weaker integrated graphics instead of the gaming card. Some systems support hybrid or multi-GPU display arrangements, but that is not the standard starting point for a single gaming monitor.
How to Recognize the Graphics-Card Ports
Look at the back of the PC:
- Motherboard display ports sit with the built-in USB, Ethernet, and audio connectors near the top.
- Graphics-card display ports sit lower in the case across the removable expansion-slot area.
If the PC has no separate graphics card, use the motherboard video output. The processor must include working integrated graphics for that output to produce a signal.
Step-by-Step Gaming Monitor Setup
Step 1: Position the Monitor Safely
Install the stand according to the monitor manual, place the screen on a stable surface, and leave enough space for ventilation and cable bends. If using a monitor arm, confirm its weight limit and VESA compatibility before mounting the display.
Avoid pressing on the panel while attaching the stand. Large ultrawide and curved monitors may require two people to lift safely.
Step 2: Connect Power
Connect the supplied power cable or adapter to the monitor and a suitable outlet or surge protector. Turn the monitor on. A standby light or on-screen message should appear even before the video cable sends a picture.
Step 3: Connect the Video Cable
Connect one end of the selected cable to the gaming monitor and the other end to the graphics card or video-capable laptop port.
DisplayPort connectors may include a release mechanism. Do not pull forcefully when disconnecting one. HDMI and USB-C connectors normally pull out without a latch.
Use a direct connection when possible. Docks, splitters, converters, extension cables, KVM switches, and capture devices can introduce bandwidth limits or another troubleshooting point.
Step 4: Select the Correct Monitor Input
Open the monitor’s on-screen display using its joystick or buttons. Select the input matching the connected cable:
- DisplayPort or DP
- HDMI 1 or HDMI 2
- USB-C
Automatic input detection often works, but manually selecting the input is one of the quickest fixes for a “No Signal” message.
Step 5: Start the PC and Let Windows Detect the Display
Windows normally detects a directly connected monitor automatically. If the display stays blank, press Windows key + P and select PC screen only, Duplicate, Extend, or Second screen only as appropriate.
For a second display that does not appear, open Settings > System > Display > Multiple displays > Detect. Microsoft’s multiple-monitor setup guide also explains how to identify and rearrange screens.
Step 6: Set the Native Resolution
Open Settings > System > Display. Select the gaming monitor if several displays are connected, then choose its recommended native resolution under Display resolution.
Examples include:
- 1920 × 1080 for a Full HD monitor
- 2560 × 1440 for a QHD monitor
- 3440 × 1440 for a common 34-inch ultrawide
- 3840 × 2160 for a 4K monitor
Using a lower non-native resolution can make text and game details look soft. If the native resolution is missing, check the cable, adapter, port capability, graphics driver, and monitor input setting.
Step 7: Set 144Hz, 165Hz, 240Hz, or the Intended Rate
In Windows 11, open Settings > System > Display > Advanced display. Select the gaming monitor and use Choose a refresh rate.
Microsoft’s official refresh-rate instructions confirm that the available options depend on the display and connection. Selecting some higher rates may also change resolution when the current connection cannot carry both settings together.
Choose the monitor’s intended operating rate rather than assuming Windows selected it automatically. A display advertised as 165Hz may require an overclock option in its on-screen menu before 165Hz appears, while 144Hz may be its standard mode. Follow the model’s manual rather than enabling an unsupported setting.
Step 8: Make It the Main Display
If you have more than one monitor, select the gaming screen in Windows Display settings and enable Make this my main display. Games and full-screen applications are more likely to launch on it by default.
Drag the numbered display boxes so their arrangement matches the physical screens. Correct alignment prevents the pointer from jumping at an unexpected height when moving between monitors.
Step 9: Enable Variable Refresh Rate
Variable refresh rate synchronizes the display’s refresh behavior with changing game frame output. The exact setup depends on the monitor and graphics hardware.
First open the monitor’s on-screen menu and enable its adaptive-sync, FreeSync, or compatible VRR option. Then verify the feature in your GPU software.
For AMD graphics, the AMD FreeSync setup guide says compatible systems normally enable FreeSync automatically, but its status can be checked in AMD Software under Display Settings.
For NVIDIA graphics, open the NVIDIA Control Panel and look for Set up G-SYNC under Display. NVIDIA’s G-SYNC instructions require a compatible display to be connected and enabled.
Menu names and available options differ by GPU, driver, monitor, connection, and certification. A monitor can work at a high fixed refresh rate even when VRR is unavailable.
Step 10: Configure HDR Only When It Helps
If the monitor supports useful HDR and the selected connection carries the required mode, open Settings > System > Display > HDR and enable the appropriate Windows HDR setting.
An HDR input label does not guarantee strong HDR image quality. Peak brightness, contrast, local dimming, black levels, color gamut, tone mapping, and panel technology affect the result.
If enabling HDR produces washed-out desktop colors, check the monitor’s HDR mode, Windows calibration, graphics-driver color settings, and the specific game’s HDR configuration. It can be reasonable to leave HDR off for normal desktop work and enable it only for supported games or video.
Do You Need to Install a Monitor Driver?
Windows often identifies a monitor and exposes its basic resolution and refresh rates without a separate driver. A manufacturer driver can provide the correct monitor name, color profile, or additional mode information for certain models.
Install software only from the monitor manufacturer’s official support page. Avoid generic driver-download sites.
Graphics drivers matter more. Install the current appropriate driver for your NVIDIA, AMD, or Intel graphics hardware, especially if the monitor is not detected correctly or expected display modes are missing.
How to Connect Monitor Audio and USB Ports
DisplayPort, HDMI, and compatible USB-C connections can carry digital audio. If the monitor includes speakers or a headphone output, Windows may switch audio to the monitor automatically.
To choose the output, select the speaker icon on the taskbar and choose the monitor, headset, speakers, or other playback device. If the monitor appears as an audio device but produces no sound, confirm that it actually has built-in speakers. Some monitors accept audio only to pass it through a headphone jack.
The USB ports on a monitor are separate from its video function in many setups. HDMI and DisplayPort do not normally carry USB hub data. Connect the monitor’s USB upstream cable, often USB-B to USB-A or USB-C, if you want its USB ports, firmware utility, KVM feature, webcam, or lighting controls to communicate with the PC.
How to Connect a Gaming Monitor to a Laptop
The process is similar, but laptop port limitations require extra attention.
- Identify the laptop’s HDMI, Mini DisplayPort, USB-C, USB4, or Thunderbolt output.
- Confirm which port connects to the dedicated GPU if the laptop manufacturer documents that distinction.
- Use a direct compatible cable where possible.
- Connect monitor power and select the correct input.
- Press Windows key + P and choose Duplicate, Extend, or Second screen only.
- Set the external monitor’s native resolution and intended refresh rate.
- Check VRR support through the exact port used.
Laptop docks and USB-C hubs can limit refresh rate even when the laptop and monitor support a faster mode directly. If a high-refresh option is missing, bypass the dock as a test.
Running only the external monitor can sometimes simplify performance or VRR behavior, but results depend on the laptop’s internal display routing. Consult the laptop’s official manual for its video-output architecture.
How to Set Up Two Gaming Monitors
Connect each monitor to a supported video output. Avoid using an unpowered splitter when you need two independent desktops, because basic splitters often duplicate one signal rather than create separate displays.
In Settings > System > Display:
- Select Identify to see each display number.
- Drag the displays into their physical left-to-right arrangement.
- Select Extend these displays for additional workspace.
- Choose the gaming monitor and make it the main display.
- Configure resolution and refresh rate separately for each screen.
Mixed refresh rates usually work, but specific applications, borderless-window modes, capture tools, and older drivers can behave differently. Keep graphics drivers current and test the game on the main monitor.
For a monitor shortlist after you understand the setup requirements, compare TopRated5’s gaming monitor brand guide. You can also browse the Gaming Accessories category for related setup guides.
Gaming Monitor Says “No Signal”: What to Check
Work through these checks in order rather than changing several settings at once.
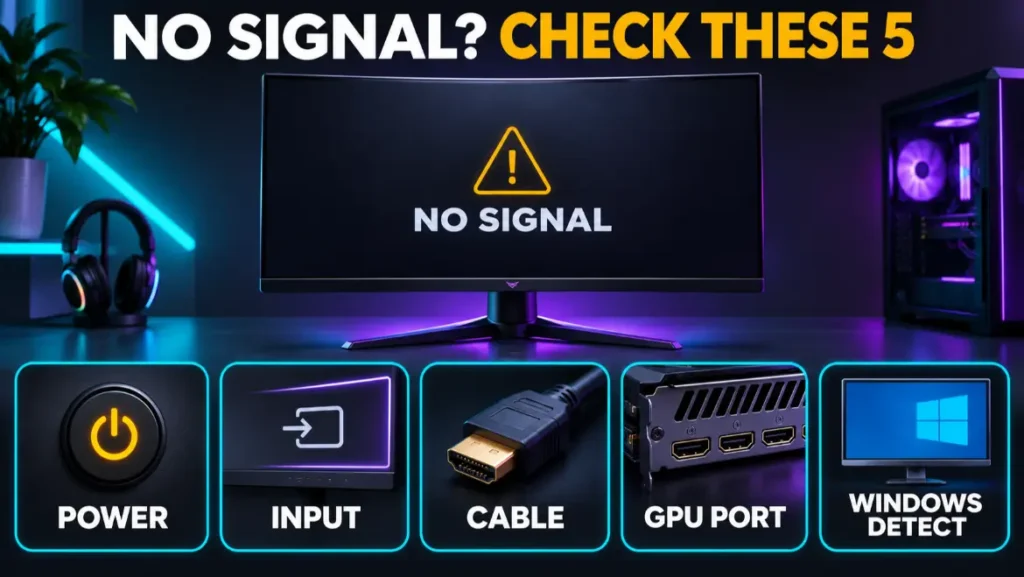
1. Confirm Power and Input
Verify that the monitor is on and shows a power or standby light. Manually select the connected DisplayPort, HDMI, or USB-C input.
2. Check Both Ends of the Cable
Reconnect the cable firmly at the monitor and PC. Try another known-working cable rated for the intended connection.
3. Use the Graphics-Card Output
On a desktop with a dedicated GPU, move the cable from the motherboard to the graphics card. This is one of the most common setup mistakes.
4. Test Another Port
Try a second output on the graphics card or a second input on the monitor. Update the monitor’s selected input to match.
5. Remove Adapters and Docks
Connect the monitor directly to the PC. If the direct connection works, the dock, adapter, KVM switch, extension, or capture device may be limiting or interrupting the signal.
6. Ask Windows to Detect the Display
Open Display settings and use Multiple displays > Detect. Press Windows key + P and select the correct presentation mode.
7. Reset the Graphics Driver
Microsoft’s external-monitor troubleshooting guide suggests Windows key + Ctrl + Shift + B as a way to reset the graphics driver when appropriate. The screen may flash and a sound may play.
8. Restart With One Display Connected
Disconnect secondary displays and accessories, leave only the gaming monitor connected, and restart. This can simplify detection and isolate a conflicting device.
9. Test the Monitor and PC Separately
Connect the monitor to another compatible device, or connect the PC to another known-working display. This helps identify whether the problem follows the monitor, cable, graphics output, or computer.
If the PC has recently been assembled or moved and no display works, internal hardware may need inspection. Shut the PC down, disconnect power, and follow the component manufacturer’s instructions before reseating a graphics card or memory. If you are not comfortable working inside the system, use a qualified technician.
Why the Monitor Is Stuck at 60Hz
A high-refresh monitor can remain limited to 60Hz for several reasons:
- Windows is still set to 60Hz.
- The cable, port, dock, or adapter lacks enough bandwidth.
- The monitor is connected to the wrong video output.
- The monitor requires a high-refresh or overclock mode in its on-screen menu.
- The selected resolution and color settings exceed the connection’s bandwidth at the desired rate.
- The graphics driver is missing or outdated.
- The monitor is duplicated with another display using an incompatible mode.
Start by opening Advanced display and checking the active signal mode. Then compare the monitor manual, PC output, cable certification, and selected input.
Do not lower resolution merely to expose a larger refresh-rate number without deciding which tradeoff is better. Native resolution at a slightly lower refresh rate can look better than a soft non-native image at a faster rate.
Common Gaming Monitor Setup Mistakes
Plugging Into the Motherboard Instead of the GPU
This can produce no picture or route the screen through integrated graphics. Use the dedicated graphics-card output for the normal single-monitor gaming setup.
Assuming the Included Cable Supports Every Mode
Use the monitor manual to confirm which cable and port unlock the advertised resolution, refresh rate, VRR, and HDR combination.
Forgetting to Change the Windows Refresh Rate
The monitor’s on-screen information may show 60Hz even though the product supports much more. Set the intended rate in Windows Advanced display.
Using the Wrong Input
An HDMI cable connected to HDMI 2 will not show a picture while the monitor is manually set to DisplayPort or HDMI 1.
Buying an Adapter Without Checking Direction
Some adapters work only in one direction. A DisplayPort-to-HDMI cable is not necessarily interchangeable with an HDMI-to-DisplayPort conversion. Active adapters may be required for specific source and display combinations.
Enabling Every Monitor Enhancement
Maximum overdrive can create inverse ghosting. Motion-blur-reduction modes can reduce brightness or disable VRR. Dynamic contrast can crush shadow detail. Begin with a neutral gaming preset and adjust one feature at a time.
Ignoring Ergonomics
Set the monitor at a comfortable height and distance, control glare, and use an adjustable stand or arm if necessary. A correct signal does not compensate for an uncomfortable viewing position.
Frequently Asked Questions
Should I Connect My Gaming Monitor With HDMI or DisplayPort?
Use whichever connection supports the monitor’s full intended resolution, refresh rate, VRR, HDR, and color depth on your exact PC. DisplayPort is commonly the simplest desktop-PC choice, while HDMI can work equally well when all parts support the required mode.
Does the Monitor Plug Into the PC or Graphics Card?
On a desktop with a dedicated graphics card, plug the monitor into the graphics card. Use the motherboard output only when relying on compatible integrated graphics or following a specific supported multi-GPU setup.
Can I Use HDMI for a 144Hz Monitor?
Yes, when the monitor’s HDMI input, PC output, cable, resolution, and color settings support 144Hz together. Check the exact monitor manual and graphics specification rather than assuming every HDMI connection offers the same modes.
Why Is My 165Hz Monitor Showing Only 144Hz?
Some monitors use 144Hz as the standard mode and require an overclock setting for 165Hz. Other causes include port or cable limits. Confirm the manufacturer’s instructions and avoid forcing unsupported custom timings.
Do I Need Both HDMI and DisplayPort Connected?
No. A single direct video cable is normally enough. Connecting both cables between the same PC and monitor can make Windows treat them as separate displays or cause input confusion.
Does DisplayPort Carry Sound?
Yes, DisplayPort can carry digital audio. The monitor must have speakers or an audio output for you to hear it, and the correct playback device must be selected in Windows.
Do I Need a USB Cable From the Monitor to the PC?
Not for basic DisplayPort or HDMI video. You may need the monitor’s USB upstream cable to use its USB hub, KVM function, webcam, firmware software, lighting controls, or other USB features.
Can I Connect a Monitor While the PC Is On?
Modern digital display connections commonly support connection detection while devices are running. If detection fails, or you are changing several cables, shutting down first can make troubleshooting clearer. Always disconnect PC power before working inside the computer.
How Do I Know the Monitor Is Running at 144Hz or More?
Open Settings > System > Display > Advanced display and read the selected refresh rate and active signal mode. The monitor’s information menu may also show the current incoming resolution and refresh rate.
Why Does the Screen Flicker at the Highest Refresh Rate?
Possible causes include an unsuitable or damaged cable, an unstable monitor overclock, VRR behavior, a driver issue, or a bandwidth limitation. Test a certified shorter cable, standard rather than overclocked refresh rate, another port, and updated graphics drivers.
Final Gaming Monitor Connection Checklist
Before launching a game, confirm all of the following:
- The video cable is connected to the dedicated graphics card when present.
- The cable and ports support the target resolution and refresh rate.
- The monitor is using its correct input.
- Windows is set to the monitor’s native resolution.
- Advanced display shows the intended refresh rate.
- The gaming monitor is selected as the main display.
- Adaptive sync is enabled and recognized when supported.
- HDR is enabled only if you want it and the display handles it well.
- The correct audio output is selected.
- Any monitor USB hub has its required upstream connection.
- Games are configured for the correct monitor, resolution, display mode, and refresh rate.
The most reliable gaming-monitor setup is a direct DisplayPort or HDMI connection from the dedicated graphics card to the monitor, followed by manual verification of native resolution and refresh rate in Windows. Do not assume that seeing a picture means the monitor is using its full capabilities.
After the connection is working, check the monitor’s information screen and Windows Advanced display one final time. That simple verification can prevent a high-refresh gaming monitor from operating like a basic 60Hz display.